Export Revit® Files to the Documents Tool
You can export files from Autodesk® Revit® to Procore using the Procore BIM Plugin. This allows users to upload current model versions directly to the Documents tool without leaving the Revit® environment. You can also use this process to export files from AutoCAD®.
Things to Consider
Required User Permissions:
'Standard' or 'Admin' level permissions on the project's Documents tool.
Additional Information:
AutoCAD® exports .dwg files natively and does not export .rvt files.
File exports behave differently depending on the file type selected:
Native .dwg or .rvt: Exports the entire file.
.ifc or .nwc: Respects the active 3D view
Steps
Open Revit® on your Windows® computer.
In Revit®, navigate to a 3D view and click the Procore tab to access the Procore BIM Plugin.
Click the Export button to open the Export As window.
At the bottom of the window, do the following:
Enter a File Name.
Select the desired file format from the File Type menu:
Revit Project File (RVT)
IFC File (IFC)
Navisworks Cache File (NWC)
If you choose the IFC or NWC file type, you have additional settings options.Show/Hide Details
When exporting an IFC or NWC file, you can specify these additional settings:
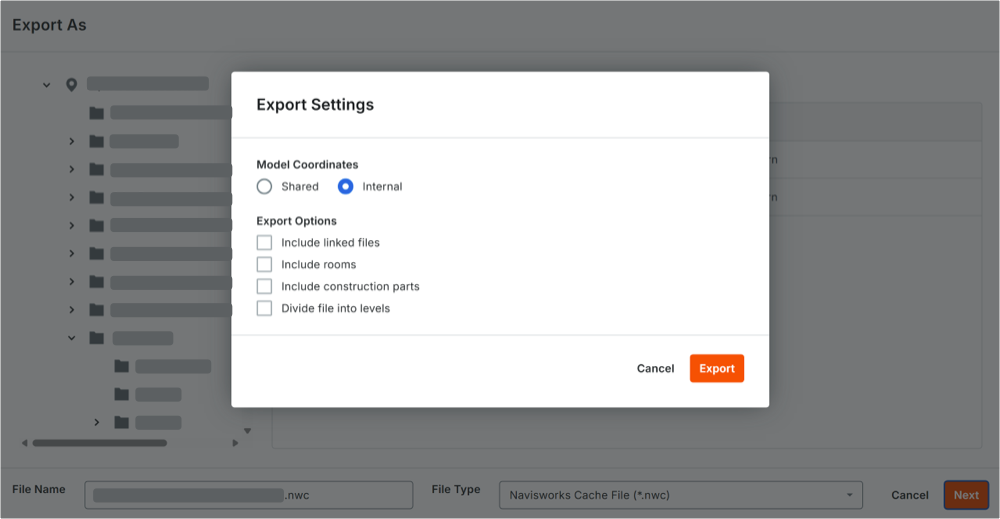
Under Model Coordination, select how your model's positioning data should be handled:
Shared: Select this option if your Revit® project uses a shared coordinate system across multiple files.
Internal: Select this option to use the model's native origin point.
Under Export Options, check the boxes to specify any additional data to include:
Include linked files: Includes geometry from linked models.
Include rooms: Includes spatial and room data.
Include construction parts: Preserves divided building components.
Divide file into levels: Separates and organizes the model structure by building story heights.
Procore remembers your preferences and automatically applies these settings to your next export. You can change them as needed.
Click Export.