Sign Lien Waivers

  1. Open the invoice with the lien waiver to sign.

  2. Click the Lien Rights tab.

  3. In the Lien Waivers table, find the waiver and click Sign.
    Note: The Sign button only appears when the lien is in the Pending Signature state.
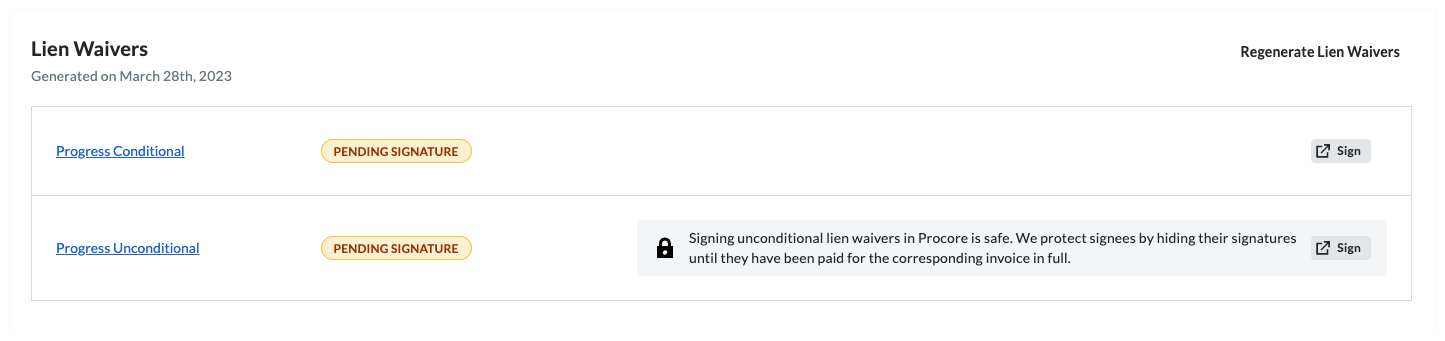
    signing-is-safe-banner.png

     Tips
    • Is it safe to sign an unconditional waiver before payment? Yes. Procore Pay protects your legal interests by hiding your signature behind a gray banner until the invoice is paid in full. If necessary, you can manually Unlock a Signed Unconditional Lien Waiver.

    • What if I don't have signature authority? You can Share Lien Waiver Signature Authority to invite the appropriate person within your company to sign the document.

  4. In the [Company Name] is Requesting a Lien Waiver window, click Fill Out & Sign. This opens the Fill Out Document window.

     Caution
    • Before signing a lien waiver, it is important to understand the different types and what you are signing to protect your legal and financial interests. See What is a lien waiver?

  5. Choose between a Conditional or Unconditional lien waiver based on the type you are signing and click Next.

    • Conditional: Use this when you expect to receive a progress or final payment; signing only waives lien rights for the specified amount on the condition that payment is actually received.

    • Unconditional: Note that these waive lien rights immediately upon signing; Procore Pay protects signees by hiding these signatures until the corresponding invoice is paid in full.

  6. Under Who should receive this document?, choose your signature option.

    • eSign. Select this option to complete an e-signature.
      Note: This option only appears when the lien waiver template allows e-signatures.

      • Click Update Signature.

      • Use the controls to input your electronic signature.

      • Click Sign Invoice.

    • Notarize. Select this option to have your document notarized electronically or manually.

      If the ‘Requires Notary’ setting is enabled, choose from the following options in the Notarize your lien waiver page: 

      • Online Notarization (24/7): Click Start Online Notarization to be connected with a certified notary from the OneNotary network. This is the best option if you do not have a notary available, as it allows you to complete the process immediately for a per-session fee.

      • In-Person eNotarization: Click Start Session to use a digital notary that you already know. This option is ideal if you have a notary on staff or a preferred local partner; if they are not yet registered, they can onboard with OneNotary at no cost.

      • Traditional In-Person: Click Download and Print to complete the process manually. Select this option if you prefer to print your documents, obtain a physical "wet-ink" signature and seal from a notary in person, and then upload the finished files back to the platform.

  7. Complete the remaining eSignature fields:

    • Requester: To add new recipients, click the Add Recipient list to select a contact or add a new one. Be sure to assign a Contact Role and click Save.

    • Email Options: To add a note, enter a message in the Add a Note box. To send a copy to yourself, enter your email in the Send a Copy To box.

  8. When you are ready to send the lien waiver to your recipients, read the Terms of Service provided and click Accept Terms and Send Document.

  9. Once you are done signing the lien waivers you will come back into the Procore Invoice and you will need to click one of these buttons:

    • To save a Draft invoice, click Save as Draft. You can complete it later before the Due Date.

    • To send your completed invoice for review, click Send. This changes the invoice's status to Under Review and sends the invoice administrator an email.
      send-or-save-invoice.png