Configure Single Sign-On in the Company Admin Tool
Background
Procore supports SP-initiated SSO and IdP-initiated SSO with Okta, OneLogin, and Microsoft Entra ID. See What is the difference between SP- and IdP-Initiated SSO? Procore also supports SSO with other service providers that are SAML 2.0 and SHA 256 compliant.
Term | SP-Initiated Context | IdP-Initiated Context |
|---|---|---|
Identity Provider (IdP) | Authenticates the user after receiving a request from Procore. | Authenticates the user directly within the IdP portal and initiates the session. |
Service Provider (SP) | Procore—initiates the login request and consumes the returned assertion. | Procore—receives and validates the unsolicited assertion from the IdP. |
Issuer URL (Entity ID) | Identifies Procore as the entity requesting authentication. | Identifies your IdP as the entity issuing the authentication assertion. |
Target URL | The IdP endpoint where Procore sends the SAML AuthnRequest. | The IdP app tile/launch URL that routes the user directly to Procore. |
SAML | Protocol used to pass requests to the IdP and assertions back to Procore. | Protocol used to push pre-generated authentication assertions directly to Procore. |
X.509 Certificate | Verifies signatures on both outgoing requests and incoming assertions. | Verifies the IdP's digital signature on the incoming authentication assertion. |
Things to Consider
Required User Permissions:
'Admin' level permissions on the Company level Admin tool.
Additional Information:
Please contact your SSO service provider if you need assistance locating the Issuer URL, Target URL, and x509 Certificate.
Prerequisites
Configure the Procore application in your identity provider's SSO software or solution.
Obtain the required SSO Settings from your identity provider's SSO software or solution.
Steps
Navigate to the Company Admin tool.
Under Company Settings, click Single Sign On Configuration.
Click Edit.
Obtain the sign-on information from the issuer: (e.g., Okta, OneLogin, or Microsoft Entra ID).
TipFor details about configuring SSO:
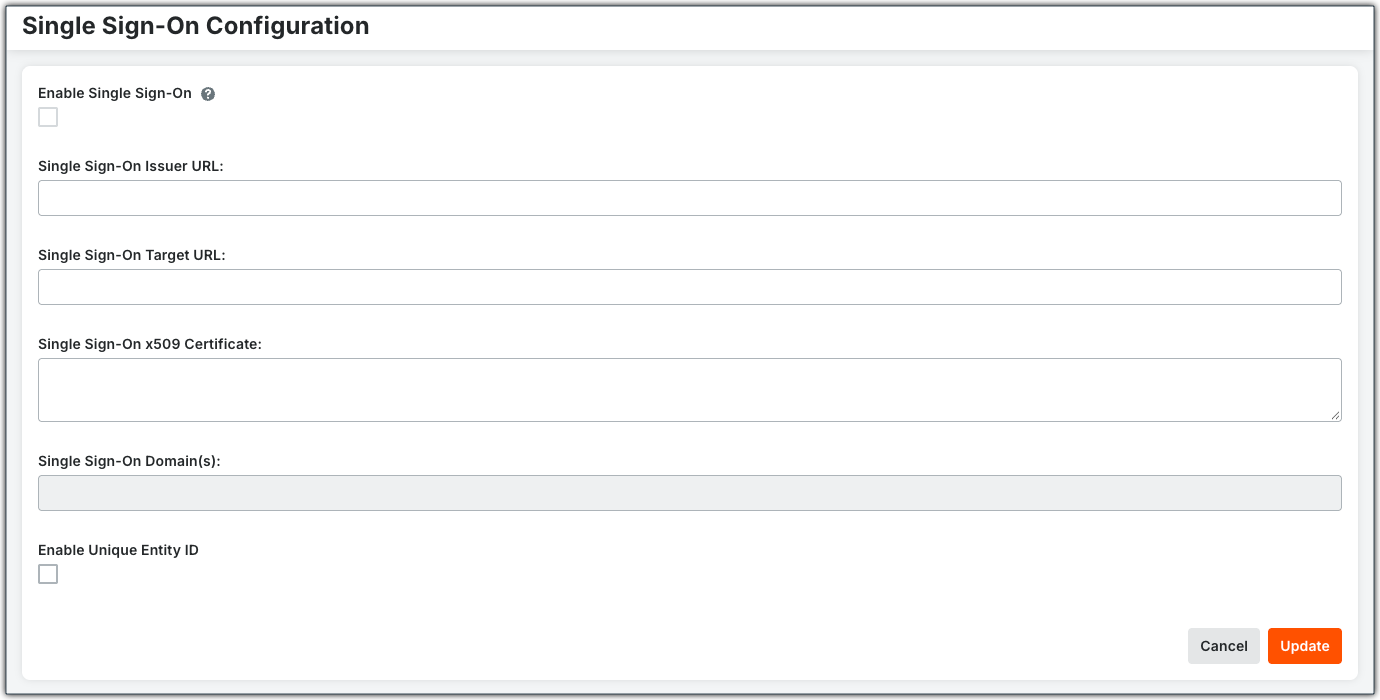
Enter the information as follows:
Single Sign On Issuer URL. This is commonly referred to as the issuer and is a unique URL that identifies the provider issuing a SAML request.
Single Sign On Target URL. This is the URL that will receive SAML requests from the provider.
Single Sign On x509 Certificate. This is the encrypted digital certificate information.
Tip: When to use 'Enable Unique Entity ID' in ProcoreSingle Instance: If your company only manages one (1) Procore company instance, clear the Enable Unique Entity ID check box.
Multiple Instances: If your company manages multiple Procore company instances and requires a dedicated enterprise application for each instance in your IdP, mark the Enable Unique Entity ID check box. Note that each Procore instance is still limited to one (1) enterprise application.
Important Requirements & Limitations:
Email Domain Rule: Procore targets SSO users by email domain. An email domain can only be mapped to one (1) Procore company instance across the entire platform.
Generating the URL: You must select the Enable Unique Entity ID check box on the SSO Configuration page in the Company Admin tool before the unique Single Sign On Entity ID URL will appear in Procore (the service provider). Once generated, copy and paste this URL into the IdP's Entity ID field.
Access & Provisioning: Enabling this check box does not alter company access. Access to a company instance in Procore is determined by a user's presence in the company's Directory tool and their configured tool permissions. Automated user provisioning is not currently supported.
